Why Are Your Underwater Photos and Videos Blue or Green? 7 Ways to Fix It
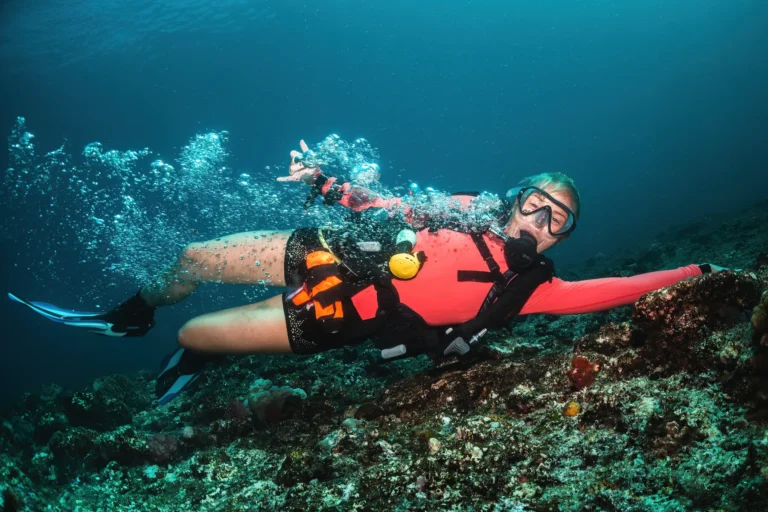
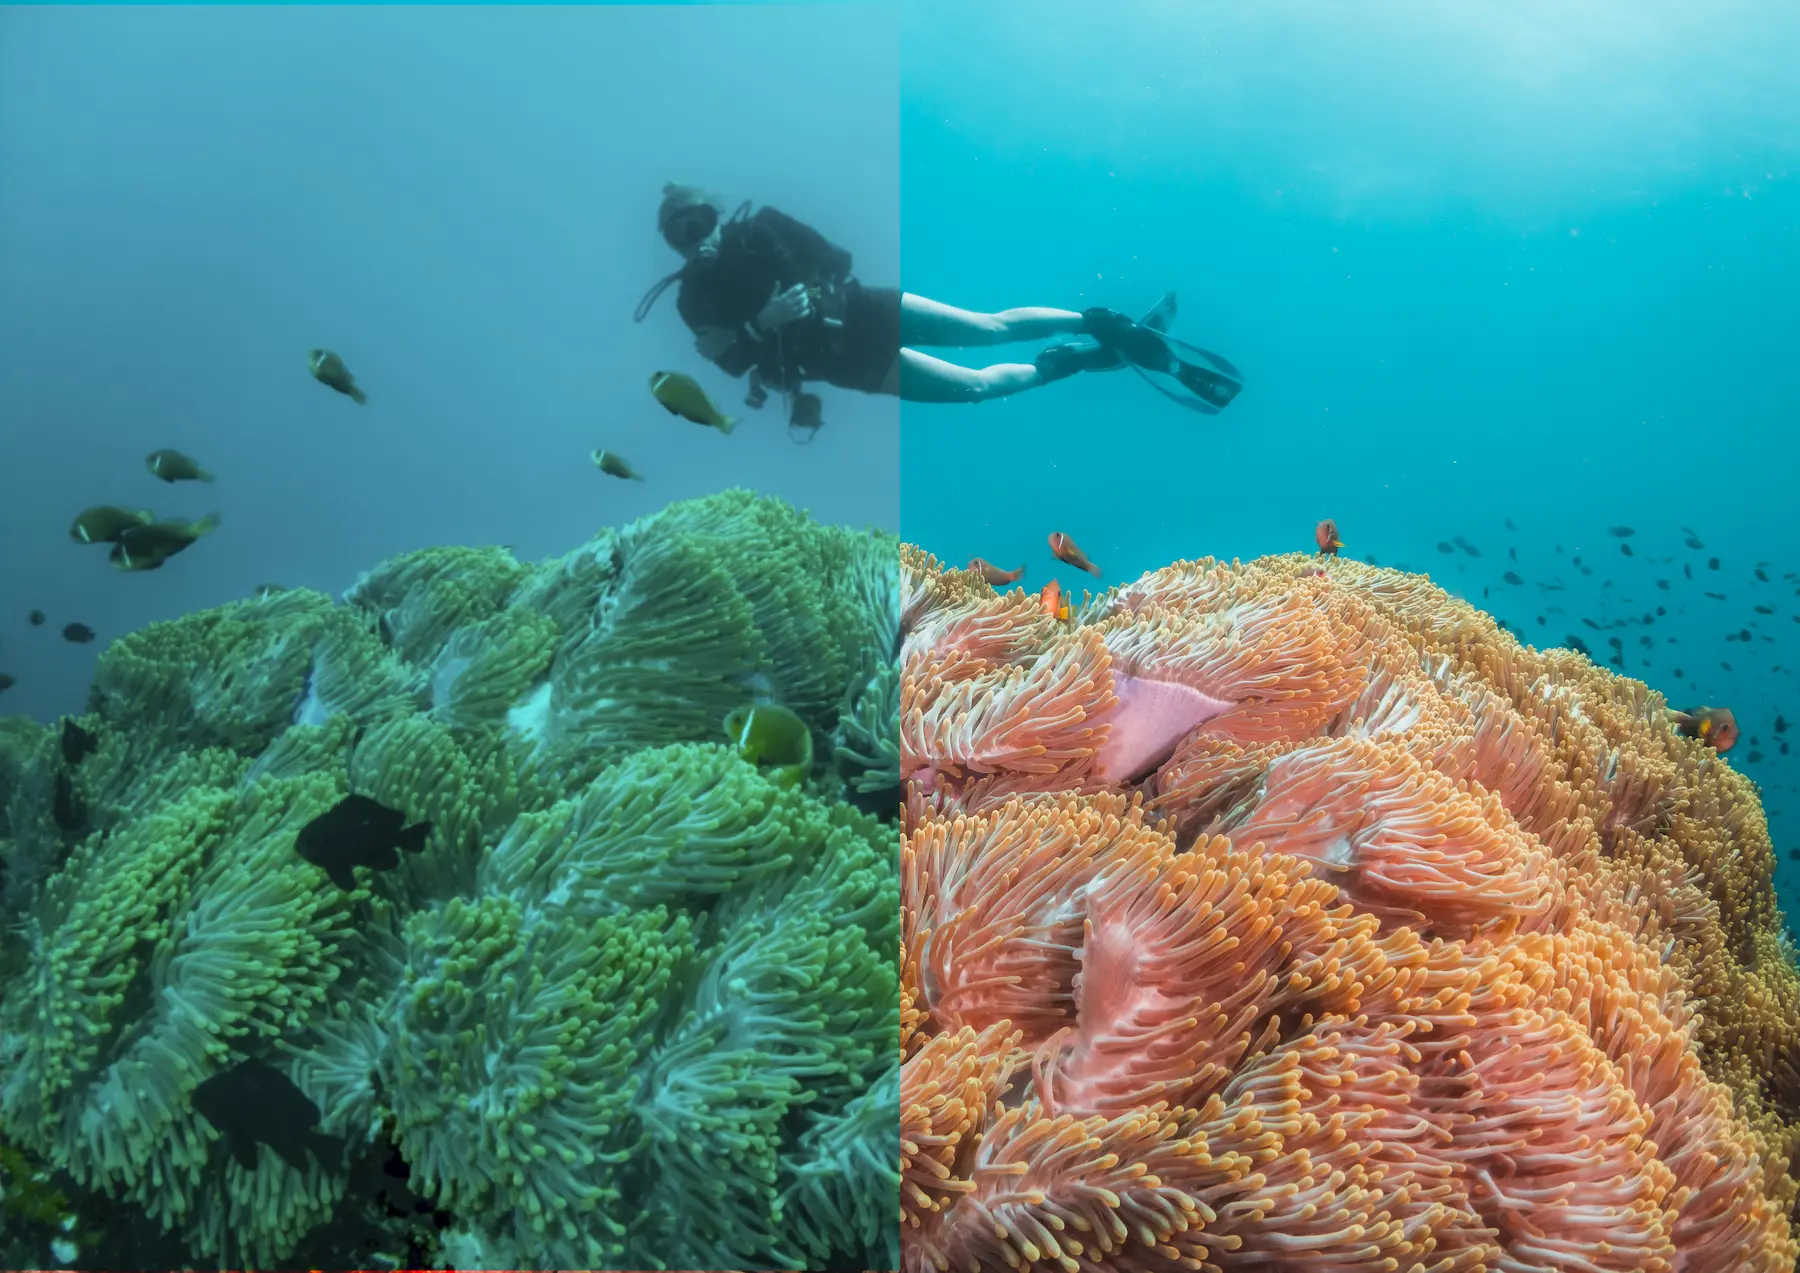
Ever taken a photograph of a colourful coral reef or watched back your underwater footage, only to find that everything looks blue, green or disappointingly washed out?
Whether you’re using a smartphone, GoPro, compact camera or professional mirrorless setup, colour loss is one of the most common challenges in underwater photography and videography.
And it’s not necessarily your camera.
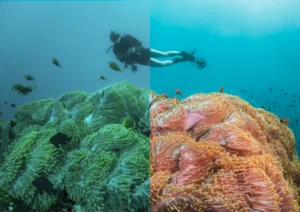
Water changes the light available to both our eyes and our cameras. As we descend, reds, oranges and other longer wavelengths are increasingly absorbed, leaving underwater scenes dominated by blues and greens.
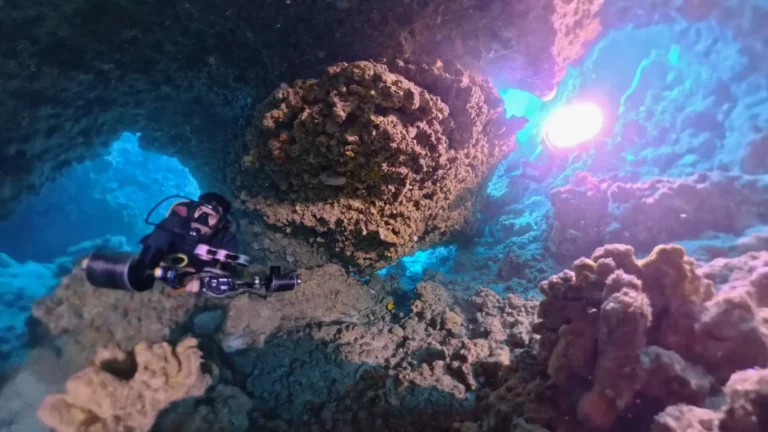
But shine a dive torch or underwater video light across that same reef, and suddenly colours that were barely visible under natural light can come to life.
After years of working as dive professionals and filming underwater across the Maldives, Indonesia, Thailand and Australia, we’ve learned that effective underwater colour correction starts with understanding light — not necessarily buying a better camera.
In this guide, we’ll explain why underwater colours disappear and share seven practical ways to improve your photos and videos, from simple techniques that cost nothing to camera settings, filters and artificial lighting.
Why Do Underwater Photos and Videos Look Blue or Green?
Sunlight contains different wavelengths of visible light, but water doesn’t absorb them equally.
Longer wavelengths, including red, are attenuated relatively quickly. Orange and yellow light also diminish with increasing distance through water, while blue and green light generally penetrates farther.
That’s why a colourful reef can appear surprisingly muted at depth.
And contrary to a common misconception, our eyes aren’t immune to this effect. Our visual system can partially compensate for changing illumination, but it can’t make missing wavelengths reappear.
The amount of colour loss depends on:
- Depth: Generally, the deeper you go, the less ambient light is available.
- Water clarity: Particles and dissolved substances affect light absorption and scattering.
- Subject distance: Light travels through water both towards the subject and back to your camera.
- Sunlight: Cloud cover, surface conditions and the sun’s angle affect illumination.
- Camera settings: White balance, exposure and processing influence how the remaining colours are recorded.
As NOAA explains in its underwater photography guidance, underwater light absorption is a major reason photographs and videos develop blue or green colour casts.
The good news is that several techniques can help.
1. Get Closer to Your Subject
This is one of the simplest and most effective improvements you can make.
The more water between your camera and your subject, the more light is absorbed and scattered before reaching your lens.
That reduces colour, contrast and clarity.
By moving closer, you reduce the amount of water the light must travel through, often producing sharper, clearer and more colourful images.
Our advice
Get closer when it’s safe and appropriate, particularly when filming smaller subjects.
With wide-angle action cameras, this can make a substantial difference because subjects often appear farther away than expected.
But remember: no photograph or video is worth disturbing marine life or damaging the reef.
Maintain excellent buoyancy, avoid contact with coral and never pursue wildlife simply to get a closer shot.
2. Make the Most of Natural Sunlight
You don’t always need artificial lighting to capture beautiful underwater images.
In shallow, clear water, natural sunlight can produce excellent results, especially for wide-angle photography and video.
However, the direction and strength of the light matter.
Use the sun to your advantage
When possible, experiment with positioning yourself so your subject receives useful illumination.
Shooting towards the surface can create dramatic light rays and silhouettes, while filming with the sun behind you may provide more even illumination.
Neither approach is universally better — they simply produce different results.
Understand the limitations
Natural light becomes less effective at revealing warm colours as depth and subject distance increase.
And a shaded coral formation can look very different from a sunlit section of reef at the same depth.
Our advice:
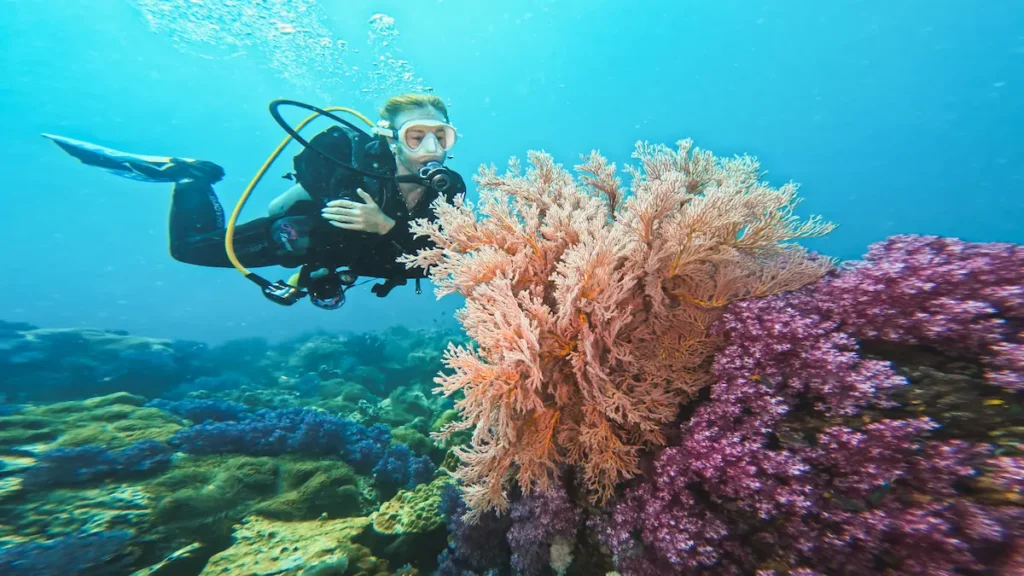
Make the most of natural light for wider scenes, then consider artificial lighting when you need to reveal colour in nearby subjects.
3. Adjust Your Camera's White Balance and Exposure
White balance controls how your camera interprets the colour of the light illuminating a scene.
Underwater, automatic white balance can struggle as conditions change.
This is especially noticeable in video, where the camera may shift its colour interpretation during a recording.
What settings do we use?
When filming with our GoPro HERO13, we often start with a fixed white balance around 6000K, rather than relying on Auto.
We find this helps produce more consistent colours between clips and reduces unwanted shifts when filming with our lighting setup.
However, 6000K isn’t a universal underwater setting.
The appropriate setting depends on your camera, water conditions, depth and whether you’re using artificial lighting.
If your camera supports custom white balance, setting it using a suitable neutral reference under the same illumination as your subject can be particularly useful.
What about smartphone cameras?
Some smartphones allow manual white balance, exposure and focus controls through their native camera application or compatible third-party software.
When we tested the DIVEVOLK SeaTouch 4 Max Plus, we used the Blackmagic Camera application to access additional controls, including manual focus.
That flexibility was one of the advantages we enjoyed about filming with a smartphone.
However, available settings and app compatibility vary by device.
RAW photography and colour profiles
If your camera supports RAW photography, it generally gives you greater flexibility to adjust white balance and colour during editing than a heavily processed JPEG.
For video, we often prefer standard or natural colour profiles because they suit our editing workflow.
LOG recording can provide additional grading flexibility on supported cameras, but it requires appropriate exposure and colour management.
Don’t forget frame rate
We frequently film action-camera footage at 4K/60fps because it allows us to create slow-motion sequences.
However, 60fps can be less forgiving in low light than 30fps when shorter exposures are required.
If your footage is dark or noisy, consider whether your frame rate and exposure settings suit the conditions.
For a more technical explanation of underwater white balance, see Divers Alert Network’s guide to recovering underwater colour.
Watch: How We Film Cinematic Underwater Footage With an Action Camera
Want to see how we put these camera settings and techniques into practice?
In this tutorial, we share our GoPro HERO13 setup, preferred white balance and colour settings, and the filming techniques we use to capture smoother, more cinematic underwater footage.
Although we’re demonstrating an action camera, many of the principles — from understanding light to getting closer to your subject — apply to underwater videography more broadly.
Watch our cinematic underwater filming tutorial below.
4. Understand What Red and Magenta Filters Can Actually Do
Colour-correction filters are popular with underwater photographers and action-camera users.
But there’s an important misconception.
A red filter doesn’t add red light to the scene.
Instead, it reduces selected wavelengths reaching the camera to help balance the available ambient light.
Red filters are commonly used in blue water, while magenta filters may be useful in greener conditions.
When are filters useful?
Filters can help in suitable ambient-light conditions, particularly when filming without artificial lighting.
Their effectiveness depends on water colour, depth and available sunlight.
When should you avoid them?
Filters reduce the overall light reaching your camera.
In low-light conditions, they can contribute to darker or noisier images.
And if you’re illuminating your subject with white video lights or strobes, a colour-correction filter can introduce an unwanted cast.
Our advice:
Don’t assume a filter is the solution to every underwater colour problem. Understand the available light before deciding whether one will help.
5. Add Artificial Lighting to Reveal Underwater Colours
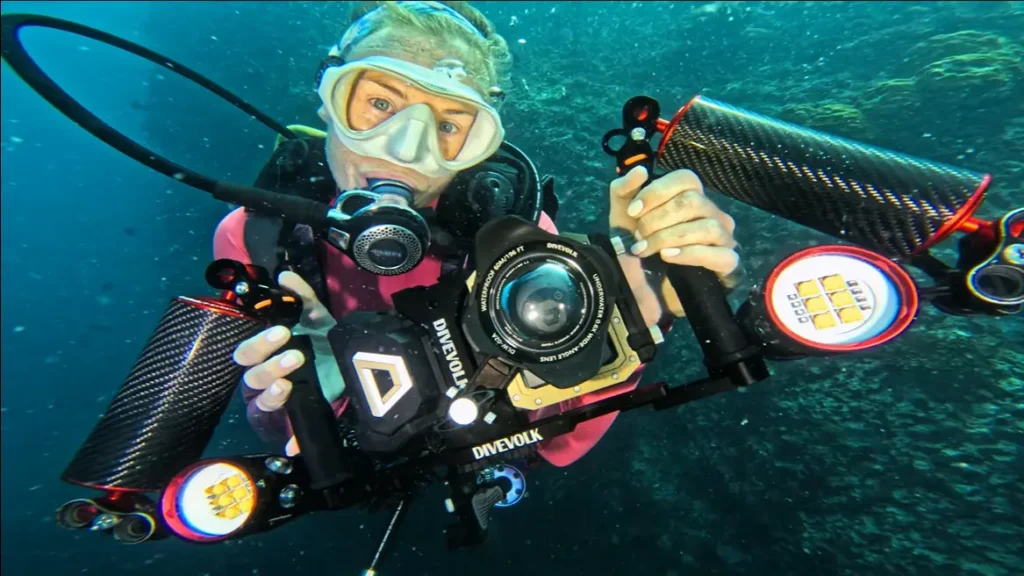
This is where the biggest transformation can happen, particularly when photographing or filming subjects at close range.
If you’ve ever watched a diver shine a torch across a reef, you’ve seen the difference.
Colours that looked muted under ambient light suddenly become visible because the artificial light provides wavelengths that were otherwise insufficiently available.
But different types of underwater lighting serve different purposes.
Underwater video lights
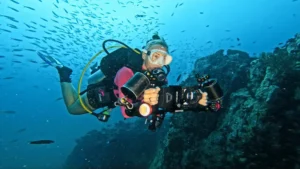
Continuous video lights provide steady illumination, making them useful for filming moving subjects and composing video sequences.
They’re particularly valuable for:
- Macro videography.
- Close-up reef scenes.
- Subjects beneath ledges.
- Shaded environments.
- Low-light filming.
- Smartphone and action-camera rigs.
We currently use LetonPower Sealion L24 video lights, which were supplied to us for testing.
After comparing them with our previous SUPE lighting setup, we’ve particularly enjoyed their colour profile and coverage.
If you’re considering adding artificial lighting to your camera setup, we’ve put together a complete underwater video lights guide covering how to choose suitable lights, position them correctly and get better results underwater.
Read our Underwater Video Lights Guide for practical setup advice and our own equipment recommendations.
Watch: How to Set Up Your Underwater Video Lights
Choosing underwater video lights is only half the challenge. Knowing how to position and use them can make an enormous difference to your footage.
In this tutorial, we walk through underwater video lighting techniques, including camera rig setup and practical ways to illuminate your subjects.
If you’re considering adding lights to your camera setup, this is a useful place to start.
Watch our underwater video lighting tutorial below.
For more detailed advice on choosing lights, mounting accessories and improving your results, read our complete underwater video lights guide.
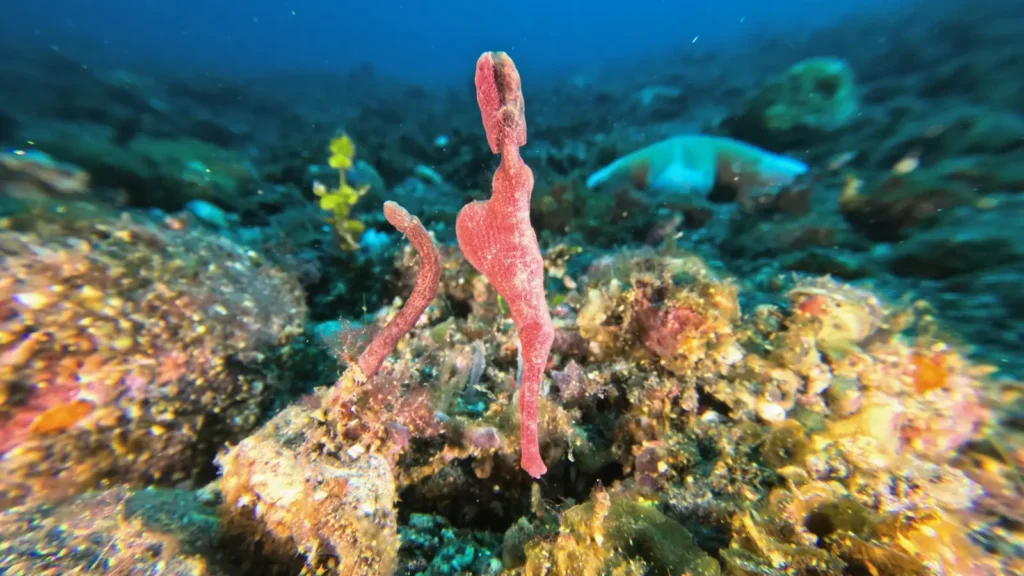
Underwater photographic strobes
Strobes produce a brief, powerful flash of light during a photographic exposure.
They’re often particularly suitable for dedicated underwater still photography, where their output and short flash duration can help illuminate subjects and freeze movement.
However, strobes and continuous lights aren’t interchangeable.
If you’re primarily recording video, you’ll generally need continuous illumination.
If you’re primarily taking still photographs, a compatible strobe system may be the better investment.
Do you need one light or two?
A single light can be a useful starting point for close-up filming.
Two lights provide greater flexibility when illuminating wider subjects and managing shadows.
But placement, beam quality and subject distance matter just as much as the number of lights.
For our own wide-angle video setup, we generally prefer two appropriately positioned video lights.
Which underwater lighting equipment should you buy?
Rather than choosing purely by advertised lumens, consider:
- Beam angle and coverage.
- Light quality and colour rendering.
- Battery life.
- Underwater controls.
- Depth rating.
- Mounting compatibility.
- Your typical subject distance.
- Whether you primarily shoot photos or video.
LetonPower discount for our readers
LetonPower offers underwater lighting equipment and mounting accessories for different camera systems.
Explore LetonPower underwater lighting and accessories
Discount code: AARONCASSIE — 15% off, subject to current promotional terms.

Affiliate disclosure: LetonPower has supplied us with equipment for testing. We may earn a commission on qualifying purchases through our affiliate links, at no additional cost to you. Our recommendations reflect our own experience, and we distinguish products we’ve tested from those we haven’t.
6. Position Your Lights Correctly to Reduce Backscatter
Artificial lighting can dramatically improve underwater colour, but poor positioning can introduce another problem: backscatter.
Backscatter occurs when light illuminates suspended particles that scatter light towards the camera.
In photographs, this can appear as bright specks. In video, it can create distracting particles or a hazy appearance.
Why does light positioning matter?
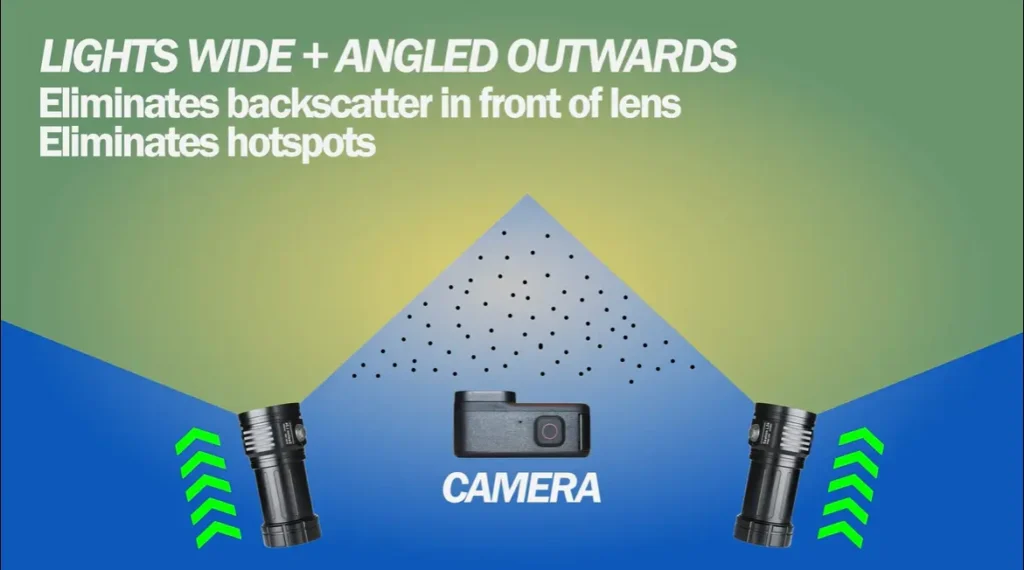
If your lights are close to the lens and pointed directly ahead, they may illuminate the water between your camera and your subject.
A common solution is to position lights farther away from the camera’s optical axis and angle them towards the subject.
This reduces the amount of intervening water being illuminated.
What equipment helps?
Depending on your camera setup, useful accessories can include:
- Camera trays and handles.
- Adjustable light arms.
- Ball mounts and clamps.
- Float arms for buoyancy management.
These accessories don’t directly restore underwater colour, but they can help you position your lighting more effectively and manage the rig comfortably.
We explain our preferred lighting arrangements in our underwater video lights setup guide.
Remember that adding more equipment also adds bulk, drag and task loading. Your camera rig should never interfere with safe diving.
7. Improve Your Underwater Colours in Editing
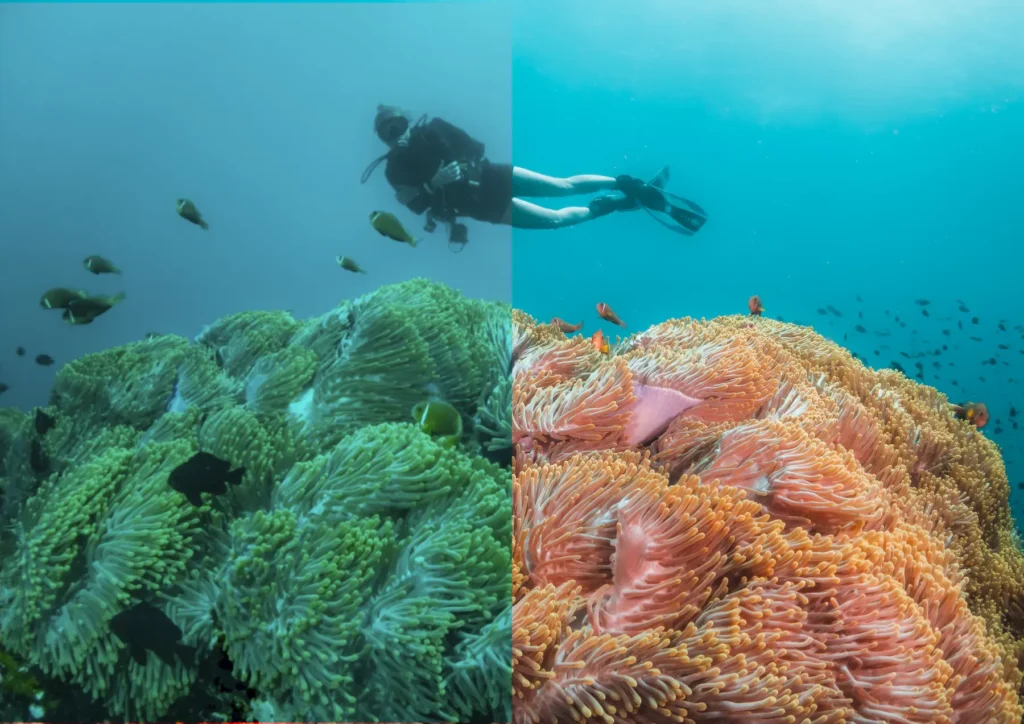
Even with good technique, underwater photographs and videos can benefit from colour correction.
Editing allows you to adjust:
- White balance.
- Temperature and tint.
- Exposure.
- Contrast.
- Saturation.
- Individual colour channels.
However, editing has limits.
If very little information from a particular colour channel was recorded, aggressively increasing that channel can produce noise, artefacts or unnatural colours.
For underwater photography
RAW files generally provide greater editing flexibility than JPEGs, where supported.
Start with white balance and exposure, then refine contrast and colour.
Avoid oversaturating coral or marine life simply to make the image appear more dramatic.
For underwater video
Consistent camera settings make footage easier to colour-correct across multiple clips.
We prefer to capture the best possible image underwater and use editing to refine it, rather than relying on aggressive correction afterwards.
Our advice:
Good editing improves a well-captured image. It cannot fully replace good lighting and filming technique.
Ultimately, underwater colour correction starts before you press the shutter or hit record. Understanding light, choosing appropriate camera settings and getting your lighting right will usually make a bigger difference than trying to rescue poorly captured colours in editing.
Which Solution Is Best for Your Underwater Camera?
The principles of underwater colour correction are broadly the same, but the most suitable equipment depends on what you’re using.
Camera system | What we’d prioritise |
Smartphone in an underwater housing | Compatible housing, reliable camera controls, close subject distance and continuous lighting for video |
GoPro or other action camera | White balance, exposure, stable handling and suitable video lighting |
Compact underwater camera | RAW photography where supported, manual controls and appropriate strobes or video lights |
Mirrorless or DSLR housing | Exposure and white balance control, suitable optics, strobes for stills or continuous lighting for video |
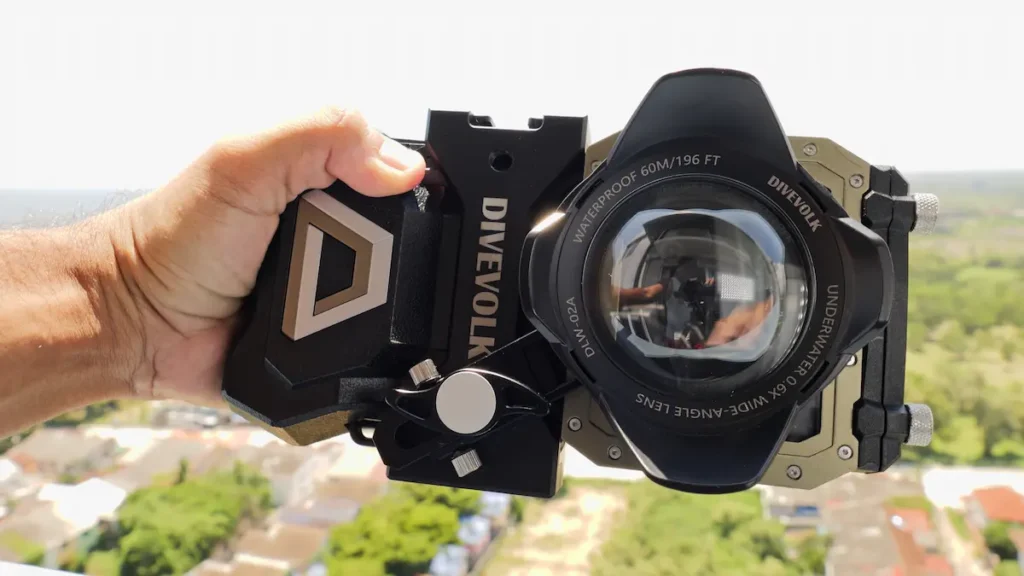
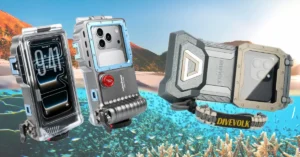
Underwater smartphone photography: DIVEVOLK vs LetonPower X45
Smartphones have become increasingly capable underwater cameras when paired with a properly rated housing.
We’ve tested the DIVEVOLK SeaTouch 4 Max Plus on scuba dives around Koh Tao and also examined the LetonPower X45 housing.
The two designs take different approaches.
DIVEVOLK provides access to the phone’s touchscreen, while the X45 uses physical camera controls.
Both have advantages and limitations.
Our X45 observations are currently based on dry-land testing, rather than an equivalent underwater comparison.
If you’re considering taking your phone diving, we’ve published a detailed comparison covering controls, compatibility, accessories and our real-world experiences.
Read: LetonPower X45 vs DIVEVOLK — Which Underwater Phone Case Is Better?
DIVEVOLK discount for our readers
If the DIVEVOLK touchscreen system suits your needs, you can explore its range of underwater smartphone housings and compatible accessories through our partner link.
Shop DIVEVOLK underwater smartphone housings
Discount code: aaronandcassie — 6% off, subject to current terms and eligibility.
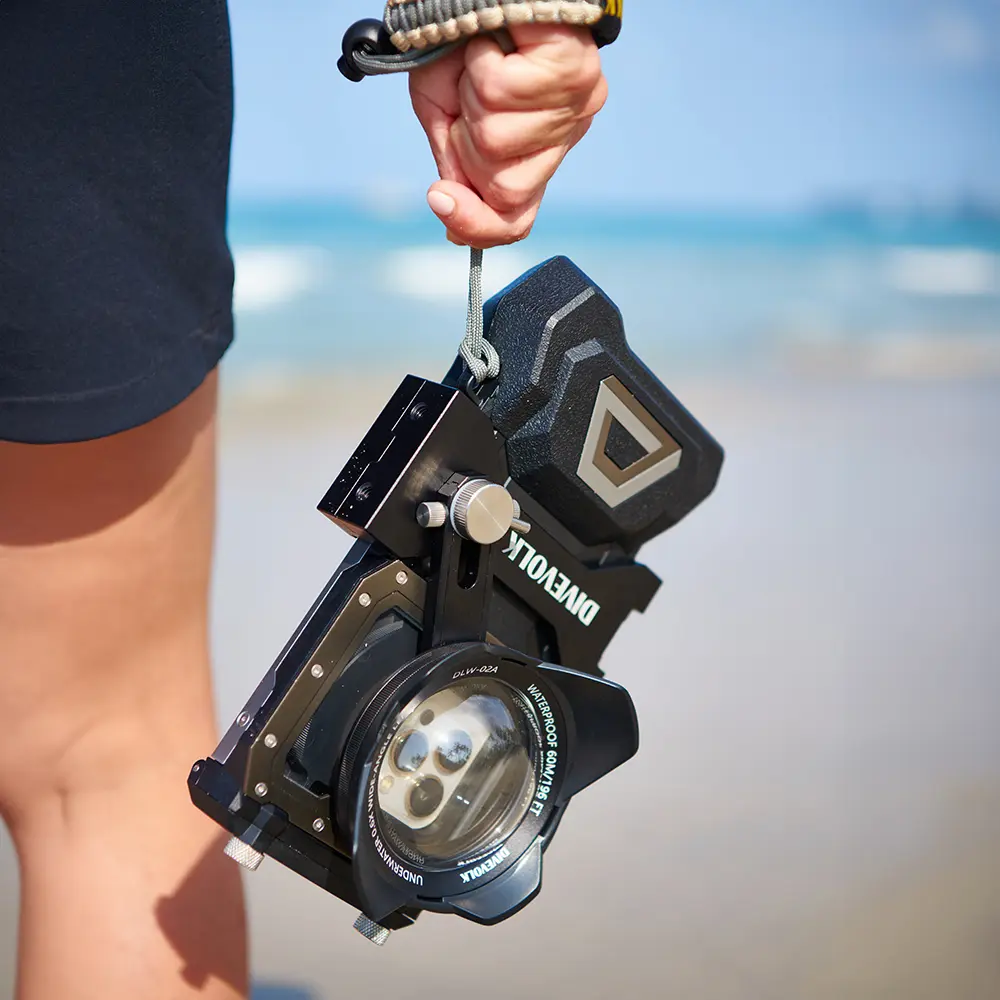
Affiliate disclosure: DIVEVOLK supplied our SeaTouch housing for review. Purchases through our affiliate link may earn us a commission at no additional cost to you.
Frequently Asked Questions
Why are my underwater photos blue?
Water absorbs longer wavelengths of light relatively quickly, leaving underwater scenes increasingly dominated by blue or green light. Depth, subject distance and water conditions affect the result.
Can I fix underwater colours without artificial lighting?
Sometimes. Getting closer, improving natural-light positioning, using suitable white balance and editing carefully can all help. However, these techniques cannot fully recreate illumination that wasn’t present when the image was captured.
Are underwater video lights better than strobes?
Neither is universally better. Continuous lights are generally appropriate for video, while strobes offer important advantages for dedicated still photography.
Should I use a red filter with underwater lights?
Generally, colour-correction filters intended for ambient underwater light should be removed when illuminating your subject with white artificial lighting, unless you have a specific creative or technical reason to use them.
Can you take professional-looking underwater photos with a smartphone?
Yes, a suitable smartphone and housing can produce excellent results, particularly with good lighting and technique. However, housing reliability, camera controls, optics and environmental conditions all influence what’s possible.
Do I need two underwater video lights?
Not necessarily. A single light can be effective for close-up subjects. Two lights can offer greater flexibility for coverage and shadow control, provided they’re positioned correctly.
Final Thoughts: Better Underwater Colour Starts With Understanding Light
Whether you’re filming with a GoPro, taking photographs through a smartphone housing or using a professional camera rig, underwater colour loss is something every photographer and videographer needs to understand.
The solution isn’t always to buy more equipment.
Start with your technique.
Get closer when appropriate, make the most of natural light, understand your camera settings and learn what colour-correction filters can realistically achieve.
Then, when you need additional illumination, choose lighting that suits your subjects, camera and diving conditions.
After years of underwater filming, one of the biggest lessons we’ve learned is that knowing how to use light is more valuable than simply owning the most expensive camera.
For more practical advice, explore our underwater video lighting guide or read our DIVEVOLK vs LetonPower X45 smartphone housing comparison.
Happy diving!
Aaron & Cassie
About the Authors
We’re Aaron & Cassie, professional scuba diving instructors and underwater photographers and filmmakers with over 5,000 combined logged dives.
We’ve spent years working and filming underwater across the Maldives, Indonesia, Thailand and Australia, using everything from action cameras and smartphone housings to professional underwater camera systems.
Our guides combine hands-on equipment experience, practical filming techniques and the knowledge we’ve gained teaching divers and working in challenging underwater environments.
You can explore more of our underwater filming tutorials, equipment reviews and destination guides on our YouTube channel and website.